Monday, January 26, 2015

Pork is a Pain in The Butt (but yummy)

Most people know that cooking isn't my strong suit.  But every once in a while I get an impulse to do something.

Recently, I went to the grocery store ostensibly for fruits, but I found myself gravitating to the Meat / Seasfood section.  There was a sale on different types of pork.  I decided to buy a boneless Boston Butt, 2.5 lb / 1.13kg in size.  I've never done anything with one, but I had visions of a nice slice of ham later on that evening.

Wrong.

Trolling through cookbooks and online places, I concluded that the main thing this part of the pig is used for is pulled pork.  So, visions of fresh southern-style barbecue danced in my head instead.


1) THE MEAT:

Yeah, like that.  I rinsed it under cold water and patted it dry with paper towels.
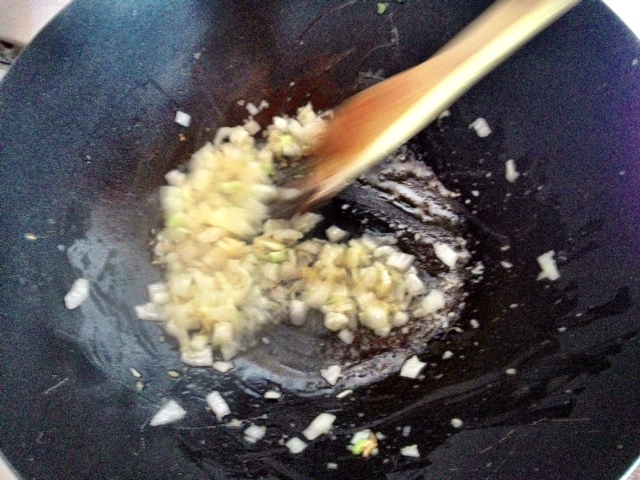
2) THE SEASONING:

I covered it with shakes of Worschestershire Sauce and rubbed it in until the top and sides were coated (I didn't mess with the strip of fat on the bottom. Most of the recipes said that sits on the bottom of the pot anyway).

I sprinkled the butt with a dry rub found in my area. It's called Virginia Coastal Premium Steak Rub. It's a mixture of pepper, garlic, onion, paprika, and no doubt some secret blend.  It's yummy. I did this in the morning, leaving the meat in the refrigerator for about six hours.


3) THE COOKING:

I used a 3/15 QT crock pot.  It's almost as old as I am, and the ceramic container cannot be detached for easy cleaning. But it's a faithful worker and the right size.

I did not add any additional liquid, but covered it and set it on low for about 12 hours. Occasionally, when the smell was too maddening, I took a peek and splashes some of drippings back over it, but mostly I left it alone.


4) THE PULLING

It's a messy business, but the meat all but fell apart before my forks.  In the end, I have enough pulled pork to about 5 or 6 barbecue sandwiches. Now I just have to decide on the sauce!


Thursday, July 3, 2014

Stuffed Jalapenos

A couple of weeks ago, we were all at a church BBQ at a friends place.  They served these stuffed jalapenos that were so good,  Susan (my daughter in law) decided that she had to try to make them.  Her first attempt was pretty good, but they were so spicy hot we could barely eat them.  We did anyway, of course, because we're gluttons for punishment.  And a true Arizonan will never admit something is too spicy.

Since then, she found the secret to cleaning them that makes the fire not so lethal.  Here is the recipe for the version she made tonight. These were very tasty, spicy but still edible. Please wear gloves when dealing with jalapenos, the oils stay on your hands forever through several washings, and if you don't wear gloves, the next time you touch your eyes or nose you will be in pain.


Stuffed Jalapenos

12 medium to large jalapeno peppers
8 oz cream cheese, softened
8 oz grated sharp cheddar (I bet these would be good with blue cheese instead)
1/3 cup bacon bits  (use real ones, no fakarooni stuff..we get ours at Costco)

Preheat your oven to 400.

Slice all the jalapenos in half lengthwise.  Put them in a big bowl of water.  While they are in the water, use your hands (with gloves on) to get out all of the seeds and membranes.  If you do it well, they will be tasty and spicy, but edible.  IF you leave membranes or seeds, they will light a fire in your mouth.  As you clean each pepper half, put it on a towel to dry.

When you've finished cleaning the peppers,  mix the cheeses and the bacon bits in a bowl until well blended. Fill each pepper half with cheese mixture.  Place them all on a cookie sheet lined with foil or parchment (cuz roasting peppers release juices that will be a pain to clean up).  Bake for 15-20 mins until the cheese is bubbly and the peppers are soft.  Cool slightly and serve warm.  YUM!

Thursday, April 17, 2014

Wine Biscuits / Chianti Cookies

Hello everyone!  It's been a while since we've exchanged recipes, so I wanted to add one of my family favorites.
Biscotti de Vino is the snooty name, but basically it's a hard biscuit type baked good, made using a sweet red wine. It's one of my father's favorites, and they're tinted purple so I like them too!

Thursday, October 24, 2013

Gulai Nangka (Young Jackfruit Curry Stew)

Hi, everyone! It’s me again… today, I’m going to share with you my gulai nangka recipe. This is another favorite dish of mine and my family. I modify this dish to accommodate my 2.5 year old kid and for those of you who don’t like their food spicy. But don’t sweat, if you it spicy, you can add sambal into it. ;)

Prepping time: 10 minutes
Cooking time: 25 - 35 minutes


Ingredients: 
1/3 big onions 
4 to 5 garlic 
A stalk of lemongrass (use the bottom only, about 3 inches from the root)
1/2 inch ginger (only if you decide to add chicken, beef or pork)
1 tsp tumeric
A can of coconut milk + a can of water
A can of young jack fruit (cut the jack fruit into half or third)
Vegetables (I use cabbage and few bamboo shoots) - you can also add in carrots
If you decided to add protein, you can add chicken enough to feed 3-4 people, or tofu

1. Blend onions, garlic, lemongrass and ginger (only if you are adding chicken, beef or pork) together. Stir fry the paste. I ran out of lemongrass, so there is no lemon grass in my cooking and it is still tasty. Now, if as you can see, I was too lazy to get my food processor out. Instead, I sliced the onions and garlic thinly. Fry it until you can smell the aroma. If you want your dish to be spicy, you can add two tablespoon of sambal or 3 or 4 bird's eye chili (Thai chili). 


2. Next, add a teaspoon of tumeric. Stir about a minute. If you decide to add chicken, beef or pork, add them now. Cook until your protein is 3/4 cooked. 


3. Then, add a can of coconut milk and a can of water to dilute. 


4. Add a can of jack fruit. Drain it before you add it to your stew. Again, I got lazy as well so I added them in big chunks but if you are sharing with many people, I suggest you cut the jack fruit to half or third of its size. 


5. Next, add your veggies. You can also add your tofu now. Stir well. Lower the heat to medium. 


6. Cover and let it simmer for about 10-15 minutes. Stir it 2-3 times to prevent the coconut milk from breaking apart. (breaking part means it'll cook and turn oily)


7. Serve warm on a bread of white or brown rice. This is a kid friendly dish so I added sambal as a condiment on the side instead of adding into the stew. 


8. Adrian says enjoy! 


Simple Malay Sambal

Hello everybody! Thanks to Meg's Omma for adding me into this tight, lovely and warm group. I'm honored. So... for my first post, I decided to share the most basic staple condiment in my household. It is called sambal. What is sambal? Sambal is a condiment made with chilies. You can add it to your rice or to a dish you’re preparing for lunch and dinner. Sambal is a staple to most Malaysians. It is so delicious and addictive; sometimes, I will eat my rice with a boiled egg, sambal and sliced cucumber (to combat spicy). There are many versions of sambal. Some people would add fried anchovies, fish paste, shrimp paste (the most popular one) or nothing. Since I’m an almost vegan, there will be no seafood ingredient added but feel free to add if you want an extra oomph.

The sambal recipe I would like to share came from a Minangkabau region. My mom’s side of family originally came from Minang, a region that is located in West Sumatera, Indonesia. It is the most original sambal.


Ingredients:
A packet of red chillies (be careful)
½ cut of big red onion or 7 or 8 shallots (I prefer shallots because it is sweeter)
3 or 4 garlic cloves
One medium size tomato (I prefer Roma coz it is less watery)
Salt, sugar and oil

Prep time: less than 10 minutes
Cooking time: 20 minutes

1. Into the food processor: chilies (cut into half), medium cut onions, garlic, cubed tomatoes and two spoon of cooking oil. Blend. The purpose of oil is to smooth out the chili seeds.


2. Stir fry the blended paste. Stir it to prevent the paste from burning. Add oil as needed. Cook the sambal until the water evaporates. Add salt to taste. Add sugar to your taste. Some people likes to add a squeezed lime or a tablespoon of vinegar to give that a sweet and sour taste. If you decided to add fish or shrimp paste, add a teaspoon along with other ingredients and blend. But if you like an overpowering taste, you can add more paste.

Some people prefer using dried instead of fresh chilies. The steps are the same except you need to soak the dried chilies into hot water first before you blend with the rest of the ingredients. 


Serve warm with rice as a condiment or add sambal to your dish. Enjoy!


Tuesday, September 3, 2013

Malaysian Soy Sauce Chicken (Ayam Masak Kicap)

I was chatting with Ricky-oppa, JoAnne and I don't remember who else one day about food.  Ricky was telling us about some dishes that his mom makes that he knows how to make.  He sent me some instructions for five of them and this is the first one that I have tried.  He described pretty well how to make it, but without much in the way of quantities.  Then I went and looked up the dish on YouTube and watched a few videos.  Turns out his mom doesn't make it like any of those, so they weren't much help, lol.  Anyway, this is how I made it tonight.  It was a hit, and got thumbs up from both Sam and Meghan. Ricky's mom uses chicken wings and legs, and most of the YouTube vids showed that too.  I used chicken breast, because that's what I had.

I didn't take pictures of all the ingredients because, frankly, I forgot, lol.  We were rushing around trying to get dinner made so that Meghan wouldn't be late to her night class.  I do have a picture of the soy sauce bottle.  This is important because this is a sweet, thick soy sauce that is not like Kikkoman or whatever kind you have for your Chinese food.  It's called Kicap Manis and I found it in the Filipino store in town.


So, these are the ingredients that I used to make enough for about five people (we had leftovers). We ate it over rice, but noodles might be good, too.

cooking oil
1 medium onion, diced
2 garlic cloves, minced
1 or 2 teaspoons of minced ginger
2 chicken breasts, cut into chunks
1/2 cup (approx) of Kicap Manis soy sauce
1/2 cup (approx) water
2 biggish potatoes, peeled and sliced (Mama Anne cuts hers in chunks, I did slices cuz it cooks faster and we were in a hurry, lol)
1 big carrot, sliced (same thing, Mama Anne cuts hers in chunks)
1/2 bell pepper, sliced...I used a yellow one

Heat a couple of tablespoons of cooking oil in a skillet or wok.  Add onion, garlic and ginger and stir and cook until fragrant.


Add chicken and cook for a bit, until it starts to get brown.  (If you're using legs and wings, the directions online say to cook about halfway through)  We did it stir fry style, where we kept stirring as it was cooking.


(wow, that's a blurry picture, Meg must have been stirring fast, lol)

After the chicken gets kind of browned, add the sweet soy, stir it around to coat all the chicken, then add the water.  


Then put in the rest of the vegetables.


Stir until the veggies are coated, then turn down the flame, cover the skillet with a lid and let it simmer.  I just happen to have a giant skillet lid that is the perfect size for covering a wok.  Let it cook until the veggies are tender.  It only took about 10 minutes, might take longer if you have chunks instead of slices.


When the veggies are done, it's ready to serve.  I think it took me about 15 minutes to prep the veggies and chicken, and about 20 to make it.  Rice was already in the rice cooker.  So that's a pretty fast, yummy dinner.  We ate it with spicy sambal oolek on the side. 


One thing I noticed in the YouTube vids was that most of them put some rice vinegar in it.  It was tasty without it, but when we were done eating, just to see the difference, we put a splash of rice vinegar in the leftovers and retasted.  I think it brightens the flavors a little bit, I liked it. I would add a Tablespoon or so when you put in the soy and water.


Saturday, April 6, 2013

Super Juicy Lemon Cake

Hello everybody! I've been baking again. Yes, there are a lot of family birthdays in spring (me first, then my daughter, then my father-in-law, and then my husband. Plus, there's also one of my husband's uncles and his favorite aunt who have their birthdays these days).
The ingredients - I only use organic stuff
The super juicy lemon cake is probably the birthday cake in my family. Because the cake is so juicy and delightfully (sweet and) sour, it is a perfect dessert even after a heavy meal. Also, it's super easy and quick to make and you only need to most basic ingredients.

Prep Time: 15 min (max)
Bake Time: 60-65 mins (11-12" cake form // 28 - 30cm )

Ingredients:

250g unsalted Butter (8.82oz), room temperature
250g Sugar (8.82oz)
4 Eggs
Lemon Zest from 2 organic Lemons, freshly grated
250g Flour (white) (8.82oz)
1 Tablespoon Baking Powder
Pinch of Salt
**
Fresh Juice of 5 Lemons
100g Powdered Sugar (3.5oz)

Make The Cake:

1) Butter a 11-12" cake from and preheat the oven to 350º F (= 180º C)
2) Beat the butter until it is soft and fluffy
3) Add the sugar and the eggs (either together or first the sugar, than the eggs) and beat until it is foamy
butter and sugar. Yum :)
4) Add the lemon zest (I use a grater, but you can also use a sharp knife)
5) Add flour, backing power and salt, and mix well
6) prepare the juice-powered sugar mix, for pouring over the still-warm cake (mix lemon juice and powdered sugar together well)

That's it! Put dough into cake form
 And don't forget to enjoy some of the dough!
Bake for approx. 60 minutes. Let the cake cool off for a little bit, then use a knitting needle and poke at least 10 holes into the cake. Pour the whole juice-powdered sugar mix over the warm cake! It takes a while to be soaked up.
Happy Birthday, dearest husband!